martes, 29 de septiembre de 2009

Simple oracle cursor loop example

Intro
The script will create all the needed objects for this example, I assume you have a user with the proper permisions to execute the example.

Script
/*This anonymous pl/sql block is to drop the table, so anytime we want to run the script it will run without problems*/
BEGIN
--drop the table
EXECUTE IMMEDIATE ('DROP TABLE number_text_pair');
--if there is some problems like it is the first time so there is no table to drop just do nothing
EXCEPTION WHEN OTHERS THEN NULL;
END;
/

/*create the table*/
CREATE TABLE number_text_pair
(
number_value integer,
text_value varchar2(4000)
);


/*create some test data*/
INSERT INTO number_text_pair (number_value, text_value) VALUES (1,'one');
INSERT INTO number_text_pair (number_value, text_value) VALUES (2,'two');
INSERT INTO number_text_pair (number_value, text_value) VALUES (3,'tree');

/*anonymous pl/sql block for iterating number_text_pair's data with a cursor*/
DECLARE
--declare the cursor
CURSOR cur_example is
SELECT *
FROM number_text_pair;
/*create a record to store the data of the table,
note the datatype of the record as row type of cur_example*/
rec_example cur_example%ROWTYPE;
BEGIN
--open the cursor to iterate it
OPEN cur_example;
--loop until there is a condition to stop
LOOP
--fetch a row data from the cursor and store it in rec_example
FETCH cur_example INTO rec_example;
--if there is no more data in the cursor then exit
EXIT WHEN cur_example%NOTFOUND;
/*output the values of the cursor to the console
note the use of . to access the fields of the record*/
DBMS_OUTPUT.put_line('Number value is: ' || rec_example.number_value || ' text value is: ' || rec_example.text_value);
END LOOP;
--close the cursor
CLOSE cur_example;
END;
/
/*the slash is to instruct the program running the script to continue after a pl/sql block,
it is not necessary when you are executing a DML statement*/
Script output
After executing the script you should see

Number value is: 1 text value is: one
Number value is: 2 text value is: two
Number value is: 3 text value is: tree
A simpler and more robust version
There is another construction to iterate over cursors, it is the for construction, a simpler more robust pl/sql to iterate the cursor is:
/*anonymous pl/sql block for iterating number_text_pair's data with a cursor*/
DECLARE
--declare the cursor
CURSOR cur_example is
SELECT *
FROM number_text_pair;
BEGIN
/*note the simpler construction, there is no need to open and close the cursor,
also there is no need to declare the record*/
FOR rec_example IN cur_example LOOP
DBMS_OUTPUT.put_line('Number value is: ' || rec_example.number_value || ' text value is: ' || rec_example.text_value);
END LOOP;
END;
/

sábado, 26 de septiembre de 2009

Replace on file with another in other directory in linux

Story

It's a long story, the thing is that my documents filesystem became corrupted and there were a lot of song that were not able to be reproduced.
I didn't know which songs were until I played them so do it by hand was not practical.
I get to create to scripts that allow me to replace all my favorites songs in my music folder with a backup of the song in a different folder.
There were some restrictions
  • The songs had to have the same name
  • The song to be replaced and the copy can be in diferent folders
The scripts

the solution is composed of two parts, a command that I run in console and a script, the command is

find -type f -exec ./replaceFiles "{}" \;

the script with name replaceFiles is

cp "$(find /another/directory/ | grep $basename "$1")" "$1" -v

How they work

When you first execute the command, for every file in the directory it is runned in it calls the script replaceFiles passing as parameter a file in the directory, the script search for the file within another directory by its name (basename "$1"), if it founds it then it copies over the original file "$1".

miércoles, 23 de septiembre de 2009

The future of cell phone

Is taking some time to people to realize that the social networking applications are not adds to their cellphones and computers but that the latter are the medium to former.
And as computers (that is a cellphone) continue to shrink the medium will become invisible and everybody will be connected.
An universally society universally connected, always...

Intel i7 turbo boost

People at marketing are genius or the average buyer is stupid.
So instead of selling a 3ghz processor that can run at 2ghz to save power they sell a 2ghz processor that can operate in turbo mode at 3ghz and everybody drops their jaws.
Tell me is just me.

viernes, 3 de julio de 2009

Slackware 13 rc1 review (32 and 64 bits)

It's been a long time since my last slackware review, this time I've been tempted to do a review of the rc1 of slackware 13 because of x86_64 support, I'll try to do a comparative between booth versions.
Booth versions will be installed as virtual machines on vmware server over kubuntu 8.04 64 bits (I had some freeze troubles with booth versions of slackware and I don't know if they are related to the fact that they were running on vmware).

Machine specs
  • Intel Q6600 quad core processor overclocked at 3.0 Ghz
  • 4 Gb of RAM
  • intel dg35ec motherboard
  • Kubuntu 8.04 64 bits
  • VMware-server-2.0.0-116503.x86_64
  • WD 250Gb SATA hard disk
Virtual machine specs
  • 1gb of ram
  • 2 processors asigned
  • 8 Gb hard disk pre allocated optimized for performance (not security)
Slackware isos
Installation process
  1. Wellcome screen: press enter
  2. select your keyboard: press 1 to select keyboard, hit enter to use the US keyboard (I selected the spanish layout)
  3. login as root: write root and press enter
  4. partition your hard disk: write cfdisk at the console, hit enter and make the partitions on your harddisk, for this test the hard disk will be partitioned 8250 mb single partition for / filesystem and a 337 mb for a swap partition
  5. begin the installation process: write setup on the console to run the good old slackware installer
  6. select the swap space option: the swap partition you have created should appear, press ok, the installer it's going to ask you to check for bad blocks, I choosed no, the installer it's going to show you a resume screen, press enter
  7. select linux partitions, in my case there is only a root partition, press enter, the installer it's going to ask you for the format mode, I selected quick format
  8. Select filesystem for your hardisk..... mmmm...... let's try ext4 :), the installer shows you a resume screen
  9. select the slackware 13 installation source, in my case a slackware cd or dvd, option 1 and press enter, select auto for the scan of the medium
  10. In my case I would make a full install of slackware, I select everything and press enter, in the prompt mode for packages installation I selected full
  11. and... and... ... it's freezed (for x86_64) version, try again with reiser fs and freeze, again with huge.s kernel and ext2 and it worked...

    test for 32 bits version will be with the huge.s kernel and the ext2 filesystem... and... and... it's freezed, well, let's try with ext4... freezed... reiserfs... freezed, hugesmp.s and ext4... and it worked...


  12. make usb flash boot, selected skip
  13. install lilo, selected simple
  14. frame buffer, selected 800x600, 256 colors
  15. extra kernel parameters: pressed enter
  16. selected no for utf-8 console
  17. lilo destination: mbr
  18. mouse configuration: imps2
  19. gpm configuration, selected yes
  20. configure your network: yes; hostname: slack; domainname com; ip address setup, selected dhcp; dhcp hostname: pressed enter; confirm setup: yes
  21. startup services: press enter and select the defaults (netatalk, fuse, hald, innetd, messagebus, pcmcia, syslog, sshd)
  22. try custom fonts: no
  23. hardware clock set to utc, no, selected my country
  24. desktop manager: kde
  25. select password for root: no (you should do it, and don't forget it)
  26. selected exit to reboot
  27. write reboot on the console and press enter
slackware 32 vs 64 times
  • installation time (only packages from the moment it install the first A section package to the make usb flash boot screen): 64 -> 20.5 min; 32 -> 27.55 min
  • first boot time (from lilo to login): 64 -> 38 secs; 32 -> 43 secs
  • second boot time (the first time it do some process that it only does the first time): 64 -> 30 secs; 32 -> 33 secs
  • first startx time (from enter to akonadi report): 64 -> 30 secs; 32 -> 64 secs
  • startx after logout from first startx (from enter to akonadi report): 64 -> 20 secs; 32 -> 20 secs

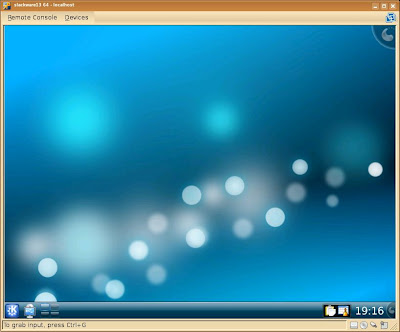
Default desktop
The default desktop is KDE version 4, kudos to kde team.

Curiosities:
  • new bootup image
  • The welcome screen of the installer iso for the 64 bits version of slackware says version 12.34567890 instead of 13 rc1 (although I found the numbers of 1 to 0 a nice detail :P), also it says that the machine has to be at least pentium pro :P

Datos personales